A good Kruger image rarely starts with a perfect camera body. It starts with patience, soft light, and a calm eye. One minute you are watching impala in pale morning mist, and the next you are trying to keep up with a fish eagle lifting off a dead branch. The bush changes quickly, and your settings need to keep pace without turning every sighting into a scramble through menus.
That is why the most useful approach is usually a practical one rather than a complicated one. If your camera is ready, your movements are gentle, and your choices respect the animal first, you will come home with stronger photographs and a far better safari experience.
Start with settings that move with the bush
Kruger is full of changing light. A lion can step from open sand into shade in seconds. An elephant can turn broadside just as the sun breaks through cloud. In these moments, many photographers do well with Aperture Priority and either Auto ISO or a manually chosen ISO range. It gives you control over depth of field while the camera helps you keep up with exposure.
A wide aperture is often the easiest place to begin. If you are photographing a single animal and want the background to fall away softly, f/4 to f/5.6 is a very comfortable range. If there are several animals on different planes, or if the landscape matters to the picture, stopping down to f/8 or f/11 can save the frame.
Autofocus also matters more than many people expect. Continuous AF, called AF-C or AI Servo on most cameras, is usually the safer choice for wildlife. It helps with walking elephants, birds shifting on a branch, or a leopard that looks still and then starts moving with no warning. If your camera offers animal or eye detection, use it, but do not trust it blindly in thick bush. Always check that focus has landed on the eye or face.
Here is a simple starting point for a typical game drive:
| Situation | Exposure mode | Shutter speed target | Aperture | ISO approach |
|---|---|---|---|---|
| Resting mammals in open light | Aperture Priority | 1/250 s or faster | f/4 to f/5.6 | ISO 100 to 400 |
| Walking animals | Aperture Priority | 1/500 to 1/1000 s | f/4 to f/5.6 | Auto ISO or 400 to 800 |
| Fast action | Shutter Priority or Manual with Auto ISO | 1/1000 to 1/2000 s | As wide as lens allows | ISO as needed |
| Birds in flight | Shutter Priority or Manual with Auto ISO | 1/1600 s or faster | f/5.6 to f/8 | ISO 800 and up if needed |
| Environmental wildlife scenes | Aperture Priority | Adjust to subject movement | f/8 to f/11 | ISO to match light |
If you are newer to safari photography, this is worth remembering: a noisy image is usually easier to live with than a blurred one.
Shutter speed is where many shots are won or lost
Animals do not have to be running to create blur. A flicking ear, breathing chest, swishing tail, or turning head can soften a photograph even when the subject looks relaxed. Add a long lens and a vehicle that is not fully still, and shutter speed becomes even more important.
A useful rule is to stay at least as fast as the reciprocal of your focal length, then go higher when the animal is moving. With a 500 mm lens, 1/500 s is a bare minimum for steadiness in ideal conditions. In real safari conditions, 1/1000 s often feels much safer.
A simple guide helps:
- Resting or slow-moving animals: 1/100 to 1/400 s
- Walking animals: 1/500 to 1/1000 s
- Running wildlife or active behaviour: 1/1000 to 1/2000 s
- Large birds in flight: around 1/1600 to 1/2500 s
- Small birds and very fast wingbeats
When the light drops, many people hesitate to raise ISO. In Kruger, it often makes more sense to accept grain and keep the picture sharp. Dawn and dusk are some of the most beautiful times in the park, and they do ask more of your camera.
Aperture, focal length and the look of the frame
A long lens helps in Kruger because the animals decide the distance, not you. A 300 mm or 400 mm lens is a very good starting place for general wildlife. If birds are a priority, or you want tighter portraits of more distant sightings, 500 mm or 600 mm becomes very helpful.
That said, longer is not always better. There are lovely moments when a wider view tells the fuller story. A small herd crossing open grassland, a giraffe under towering storm clouds, or elephants moving through silver winter bush can feel more alive when the surroundings stay in the frame.
Before you pack, think in terms of roles rather than just numbers:
- 70 to 200 mm for larger animals close to the road and wider storytelling frames
- 100 to 400 mm as a flexible safari favourite
- 500 to 600 mm for birds, shy animals and tighter portraits
Aperture shapes the mood. Wide open apertures isolate a subject and soften a busy background. Slightly narrower apertures keep more of the scene readable. Neither choice is more correct. The better question is this: do you want the viewer to feel close to the animal, or to feel the place around it?
Let the light do some of the work
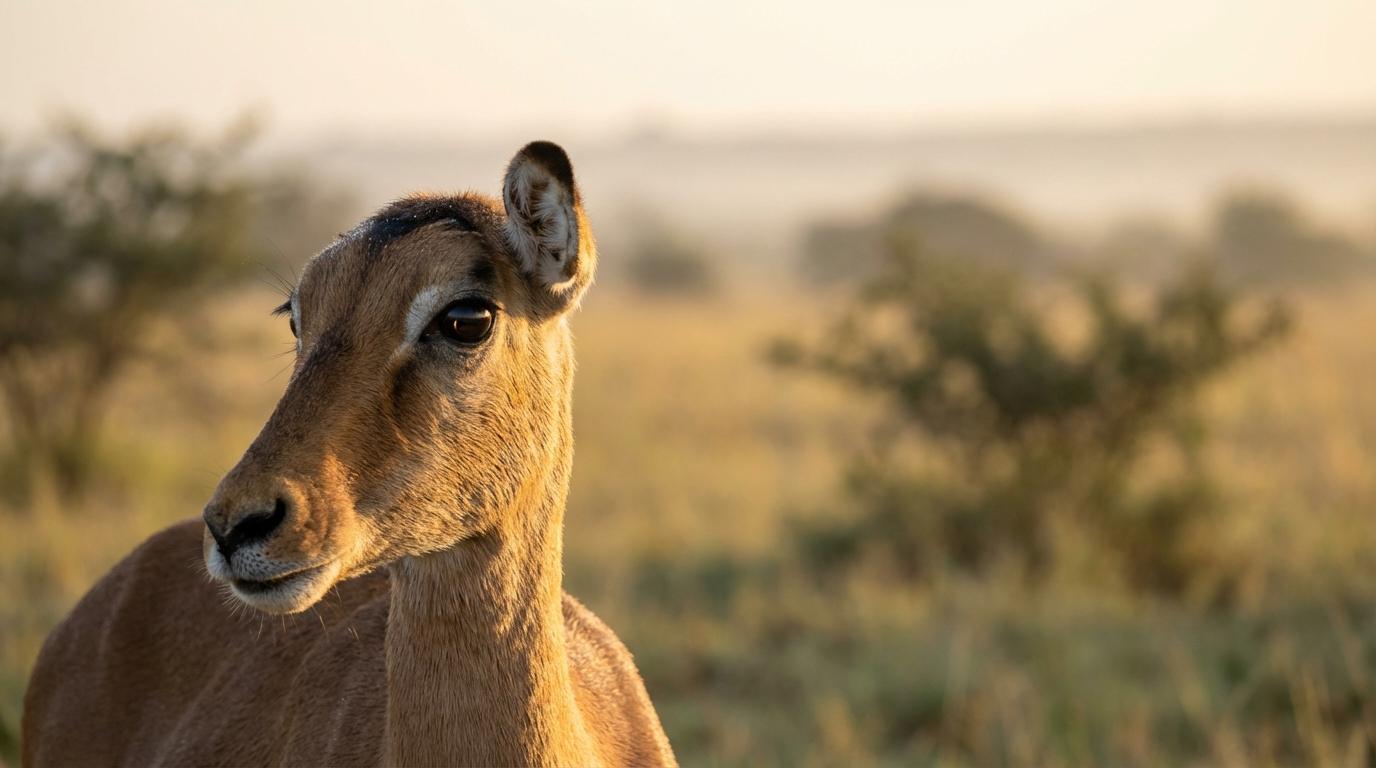
Kruger’s best light is often early and late. Just after sunrise and before sunset, colours warm up, shadows stretch out, and fur, feathers and dust come alive. The same impala that looked ordinary at noon can look almost sculpted at first light.
Midday is more demanding. The sun is harsh, contrast is strong, and many animals rest in awkward patches of shade. This does not mean you should stop shooting. It simply means you should change what you look for. Strong shape, graphic scenes, close detail, monochrome conversions, and shaded portraits can all work beautifully in harder light.
Direction matters almost as much as time of day. Front light is easy and clear, with good colour and eye detail. Side light adds texture and depth. Backlight can be magical, especially when it catches a lion’s mane, dust in the road, or translucent feathers. It can also confuse your meter, so watch your histogram and be ready to use exposure compensation.
Winter and summer each offer their own gift. Winter usually brings cleaner air, sparser bush and easier sightings. Summer can bring moody cloud build-up, dramatic skies and rich green backdrops. If rain is building in the distance, keep looking up as much as out. A strong sky can turn a good wildlife record into a memorable photograph.
Metering and focus need a little attention
Most of the time, matrix or evaluative metering works well enough. Still, the bush loves to trick cameras. A dark buffalo against bright sand, or a pale bird against deep water, can push the meter into the wrong decision.
If your subject is much lighter or darker than the background, centre-weighted or spot metering can help. Exposure compensation is useful too. A bright scene may need a touch of positive compensation. A very dark subject may need a slight pull back to keep detail and avoid a washed-out frame.
Back-button focus can also be a small change that makes a big difference. It lets you focus once, then recompose without the camera trying to refocus every time you touch the shutter. On a game drive, that extra control can be very useful when branches keep passing in front of the animal.
And yes, always focus on the eye when you can.
Good ethics make for better photographs
The strongest safari images come from respect. Animals look more natural when they are not stressed, crowded or pushed into a reaction. That calm comes through in the frame.
In Kruger, park rules are clear. Stay in the vehicle except where visitors are allowed to get out. Do not use drones. Do not bait, feed or lure animals. Do not use playback to pull birds closer. Do not alter the scene by moving branches or disturbing nests, dens or resting places.
Good field behaviour is simple, and it matters:
- Stay inside the vehicle: safety for people and wildlife comes first
- Keep a respectful distance: if an animal changes behaviour because of you, you are too close
- Avoid flash and bright lights: especially around nocturnal or sensitive animals
- Do not crowd sightings: if a scene is already congested, waiting or moving on may be the better choice
- Leave the habitat untouched: no baiting, no feeding, no rearranging the bush
There is also an etiquette with other guests and guides. Keep voices low. Avoid blocking another vehicle’s view if you have had your turn. If somebody shares a sighting with you, return the kindness when you can. Safari is at its best when it feels shared, not competitive.
If you plan any commercial filming or professional photography, official permits are normally required. Personal holiday photography is fine, but bigger productions need approval in advance.
Low light does not mean you should stop shooting
Some of Kruger’s most moving moments happen when light is thin. A hyena slipping through blue dawn. A herd of elephant cows backlit by the last orange edge of day. A sleepy lion lifting its head just before sunrise.
These scenes ask for a steady hand and realistic choices. Open the aperture. Raise the ISO. Support the lens on a beanbag or the window frame if you can. Shoot short bursts rather than single frames if the animal is mostly still. One of them may be sharper than the others.
This is also a good time to simplify. Instead of trying to make every low-light image bright and clean, let the mood stay in the picture. Deep shadows, mist, silhouettes and soft backgrounds all belong to safari photography too.
A calm routine before the gate opens
The easiest way to miss a sighting is to build your settings from scratch while it unfolds. A small pre-drive routine helps a lot, especially on early departures from Hazyview when the best light arrives fast.
Set your camera before you leave. Check battery level, memory cards, lens cloth, and exposure mode. Choose continuous autofocus. Decide whether Auto ISO will help. If you are using a long lens, make sure your minimum shutter speed is sensible for the focal length.
Then, once you are in the park, let the sighting guide the rest. If the light is soft and the subject is calm, you have room to be creative. If the action kicks off, keep it simple and stay fast. And if the animal gives only one brief look in your direction, a well-prepared camera gives you the best chance of bringing that moment home.